Featheredge, shiplap, T&G — what's the difference and which should you use?
You've got three main options for covering the outside of your shed. Each has a different look, different performance, and different fitting method. Here's the honest lowdown:
Wedge-shaped boards that overlap as they're fixed horizontally. The classic British fence/shed look. Cheap, widely available, and actually quite good. The tapered profile naturally sheds rain.
Width: typically 100–125mm
Look: Traditional
Price: £
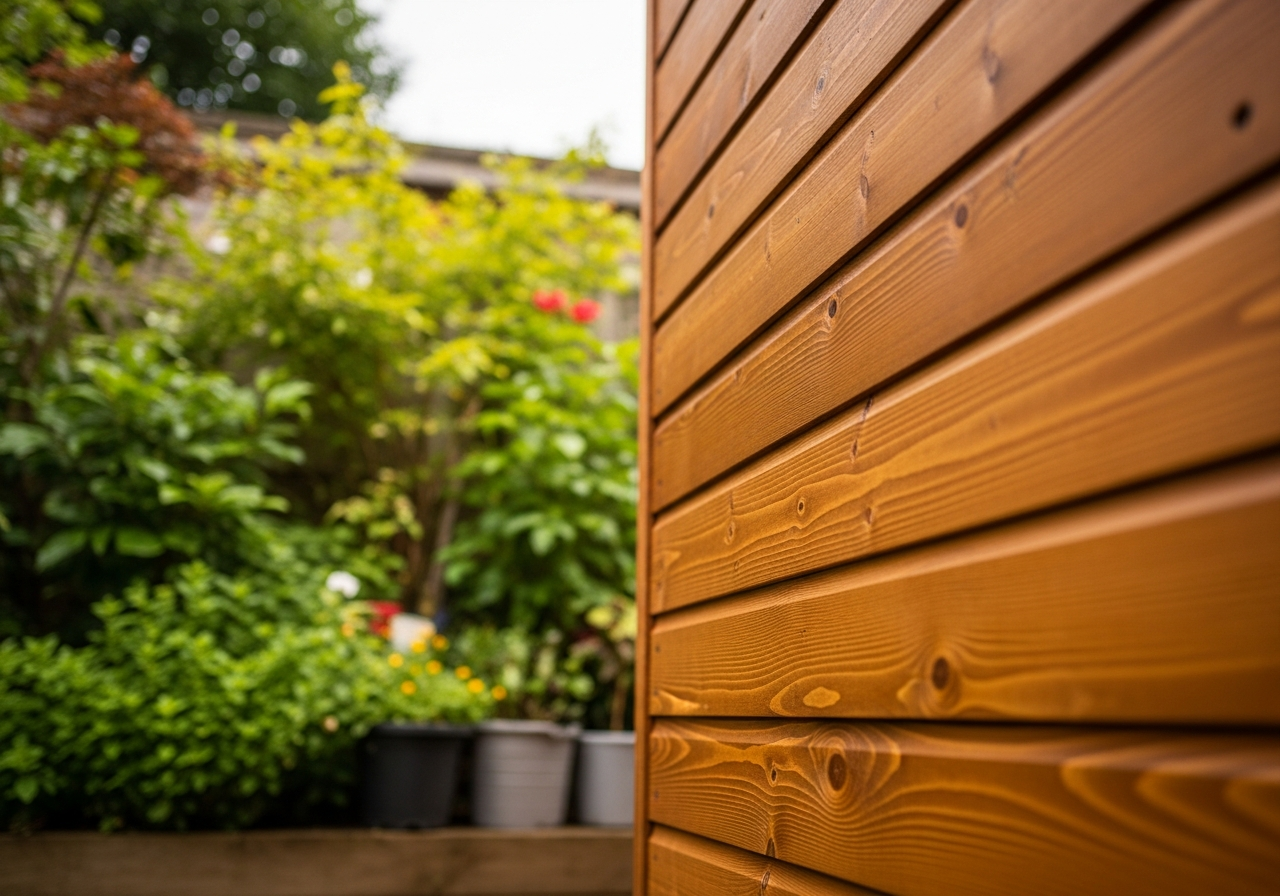
Rebated boards that interlock — the bottom of each board sits into a groove in the one below. Much more weathertight than featheredge, and looks smarter. What most decent shed manufacturers use. Worth the modest extra cost.
Width: typically 100–150mm
Look: Smart, modern
Price: ££
Each board slots into the next via a tongue-and-groove joint. Very tight, very weathertight. Used mainly for wall panels in quality garden buildings. Requires more precision when fitting but the result is excellent.
Width: typically 75–100mm
Look: Premium, flush
Price: £££
Which should you choose? For a first build, shiplap is the sweet spot. It's more weathertight than featheredge and easier to fit neatly than T&G. If you're on a tight budget, featheredge is perfectly fine with good treatment. T&G is the one to go for if you want a premium finish.
Horizontal cladding is the most common, and the method is similar for all three types. Here's how to do it right:
This is the single most important tip for long-lasting cladding. Before you fix each board, brush end-grain preservative onto the cut ends and ideally onto the back face. Once it's on the wall, you can't get to the back. Five minutes now saves years of rot.
Fix a narrow "starter strip" (a ripped-down piece of timber matching the profile) at the very bottom. This kicks the bottom board out to the correct angle so it overlaps the sill properly and sheds rain away from the base of the wall.
Fix the first full board on top of the starter strip. Use a spirit level to get it perfectly horizontal — if this one is out, every subsequent board compounds the error. Use two nails or screws per stud (one top, one bottom of the board at each stud position).
Each subsequent board overlaps the one below by at least 25mm (for featheredge) or interlocks into it (for shiplap/T&G). Fix into every stud. Pre-drilling near board ends prevents splitting. Check level every 3–4 boards.
Options for corners: butt join the boards and cover with a corner batten (simplest), mitre the corners (looks best, harder to cut), or use a vertical corner post the boards butt up against. Corner battens are the most durable and easiest option.
Cut boards to fit around windows and door openings. Run a piece of architrave (trim) around each opening to finish it neatly and seal the gap between cladding and frame. Paint or treat this trim before fitting.
Treatment and painting: Treat all cladding with a good quality exterior wood preservative before and after fitting. Then paint or stain — not just for looks, but for protection. Coloured shed paint (Ronseal, Cuprinol Garden Shades) is excellent and you can repaint every 2–3 years for decades of protection.
Time to fit the doors and windows. Nearly there.