This is where it starts looking like a proper shed. Exciting stuff. Follow the order and it all fits together nicely.
Framing goes: floor → walls (flat on the ground) → raise walls → roof structure. Build walls flat on the ground and then lift them into position — it's much easier than trying to build them vertically.
Square is everything. Measure diagonals at every stage. If the two diagonal measurements match, it's square. If not, rack the frame gently until they do before securing it. This takes two minutes and saves hours of grief later.
The floor frame sits on your base and forms the platform everything builds up from. It needs to be level, square, and solid.
Cut your 47×100mm treated timber to length for the outer rectangle of your floor. This is the "sill plate" or "sole plate". Screw the corners together using 90mm structural screws, two per corner. Check it's square using diagonal measurements.
Fit internal joists at 400mm centres (centre to centre) running across the shortest span. Use galvanised joist hangers at each end for a really solid connection, or toe-screw if you're keeping it simpler. Add blocking (short lengths between joists) in the middle of any long run.
Lay your 18mm OSB3 sheets on top, staggering the joints (don't line up the ends of adjacent sheets). Screw at 150mm centres around the edges and 300mm in the field. Use 50mm screws. The floor should feel solid and have zero bounce in it.
If on slabs, use frame fixings or coach bolts through the timber into the slab. If on concrete, use frame anchors or rawlbolts. The shed needs to be anchored down — it's surprisingly easy for wind to get under a lightweight shed.
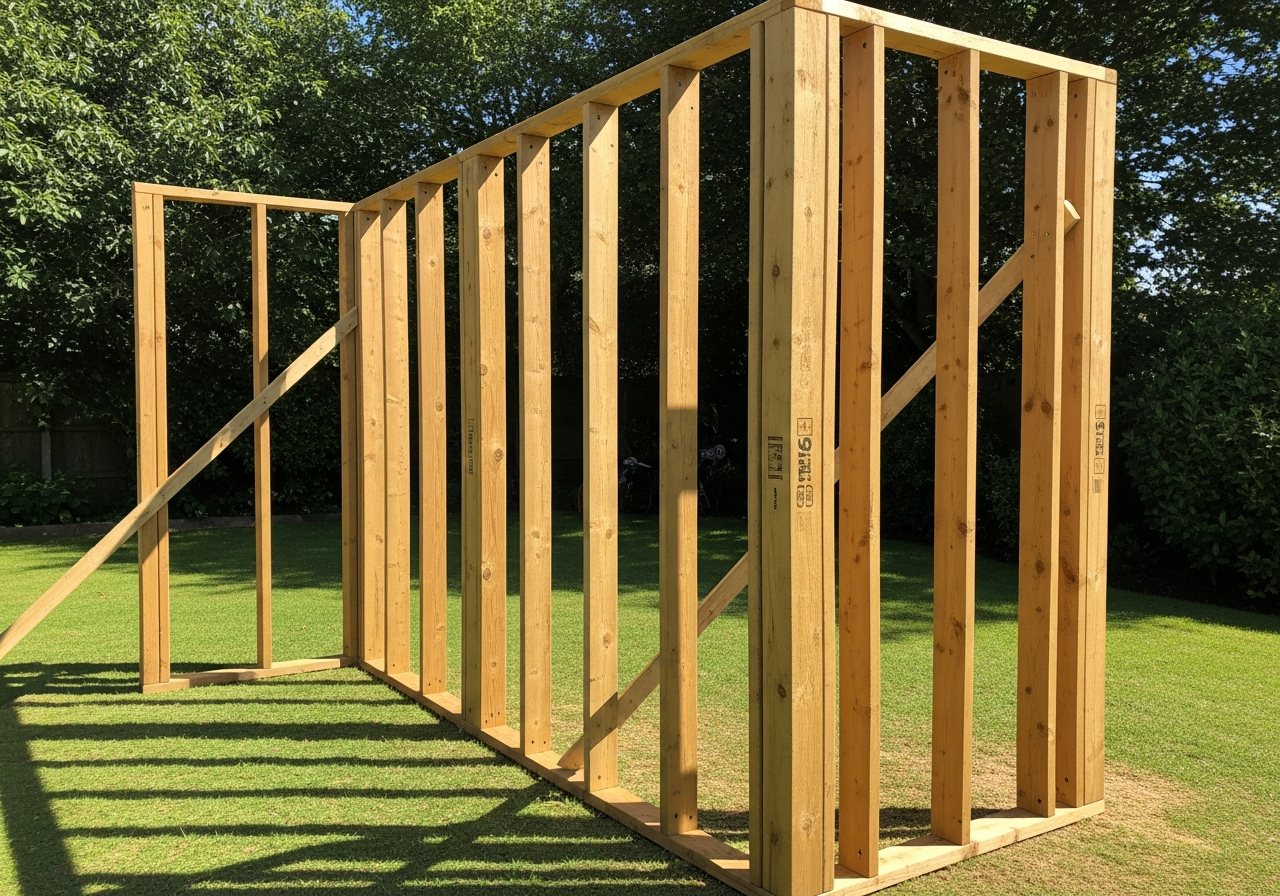
Build each wall flat on the floor (or on a flat surface nearby), then lift it into position. Much easier than working vertically.
Work out the exact dimensions for each wall, accounting for where they overlap at corners. The two end walls are usually the full width; the front and back walls fit between them — or vice versa. Sketch it out and get the numbers right before cutting anything.
Each wall frame has a bottom plate, top plate, and vertical studs at 400mm or 600mm centres. Fix studs between plates using two 90mm screws at each end, toe-screwed in. Frame in door and window openings as you go — leave the header above each opening (a short horizontal piece) to carry the load.
Before you lift any wall, add a temporary diagonal brace to keep it square while you work. A single screw at each end means you can remove it later when the whole structure is up and braced permanently by the roof and cladding.
This is where a helper is genuinely useful. Lift the back wall first, prop it up with a couple of lengths of scrap timber, and screw it down through the bottom plate into the floor frame. Repeat for the side walls and front wall. Check plumb on every wall with your spirit level as you go.
Screw adjacent wall frames together at the corners using 90mm screws at 300mm intervals. These corner joints are what makes the structure rigid. Don't be stingy with the fixings here.
This is the moment. When all four walls are up and the structure is standing, it genuinely starts looking like a shed. Pause, appreciate it, make a cup of tea. You've earned it.
Two main options: a simple pent (single slope) roof or an apex (pitched) roof. Here's both:
The easiest option. One wall is built taller than the opposite wall to create the slope. The roof joists run from the higher wall plate to the lower, with a minimum 10° pitch for felt to shed water properly.
The classic shed look. A ridge board runs along the top and rafters slope down either side. More complex to build but gives maximum headroom throughout and looks brilliant.
Time to keep the British weather out. Let's sort that roof.