The bit that turns four walls and a roof into a proper space you actually want to use. This is the fun part.
Don't paint it boring brown. Life's too short and paint is cheap. A bold colour transforms a shed from an eyesore into a garden feature. Here's how to do it properly:
New timber needs a good exterior primer or a coat of preservative first. Lightly sand any rough spots. Knock back any raised grain with 120-grit paper. Remove dust. If you've used tanalised (green-tinted) timber, let it dry for at least a couple of weeks before painting — the preservative needs to cure.
Cuprinol Garden Shades and Ronseal Fence Life are both brilliant for sheds — they're opaque, come in loads of great colours, and are designed for exterior timber. They soak in rather than sitting on top, which means they won't peel like a standard paint. One or two coats is usually plenty.
Sounds obvious, but don't paint when rain is forecast or when the timber is damp. Ideally paint on a dry overcast day — full sun dries the paint too fast and you get brush marks. Temperature should be above 5°C.
End grain soaks up moisture fastest. Make sure cut ends — particularly at the bottom of boards and around windows — are thoroughly painted or treated. This is where rot starts if you skip it.
Colour ideas: Sage green, slate blue, deep teal, terracotta, burnt orange, charcoal — all look fantastic. A colour that contrasts with your garden fence makes the shed a feature rather than an afterthought. Be brave.
If you're using the shed for storage only, you probably don't need insulation. If you're spending time in there, insulation transforms the experience. Here's what to use:
Celotex, Kingspan, or own-brand PIR board is the most efficient insulation per thickness — ideal where stud depth is limited. Cut to fit between studs and tape the joints. Brilliant for walls and roofs.
The pink or yellow fluffy stuff. Cheaper than PIR, slightly less efficient per mm, but very easy to work with. Cut with a bread knife, push between studs. Excellent for insulating walls and the ceiling.
Thin, foil-faced quilted blankets that reflect radiant heat. Good where you have very little depth to play with. Often used on shed roofs. Works best with an air gap on each side.
Don't forget the vapour barrier. When insulating, you need to manage condensation. Fit a polythene vapour barrier (1000 gauge) on the warm side (inside) of the insulation to prevent moisture from the interior getting into the insulation and rotting the frame. Tape all joins carefully.
Running electrics to a garden building is absolutely doable for a competent DIYer, but the final connection to your consumer unit must be signed off by a Part P qualified electrician. Don't skip that bit — house insurance can be voided by unregistered electrical work.
Use 2.5mm² twin-and-earth SWA (steel wire armoured) cable for the underground run. Minimum 450mm deep, in a duct, with cable tiles above for warning. Mark the route so you don't accidentally dig through it later.
A dedicated shed consumer unit with an RCD and a couple of MCBs is the right way to do this. This protects you against faults and lets you have both lighting and power circuits.
The connection at the house end to your main consumer unit must be done and certified by a Part P registered electrician. This typically costs £100–200 and is absolutely worth it for the certificate and peace of mind.
Simpler option: If the shed is close to the house, an outdoor-rated extension lead on an RCD adaptor is a legitimate temporary solution. Not ideal long-term, but it works. Always use a proper outdoor extension cable (orange, rated for exterior use), never an interior domestic one.
Lighting alone: Solar LED shed lights have got remarkably good. For basic lighting (not power tools), a decent solar panel on the roof with a battery and LED strips inside avoids the cable run entirely. Works brilliantly and costs about £60.
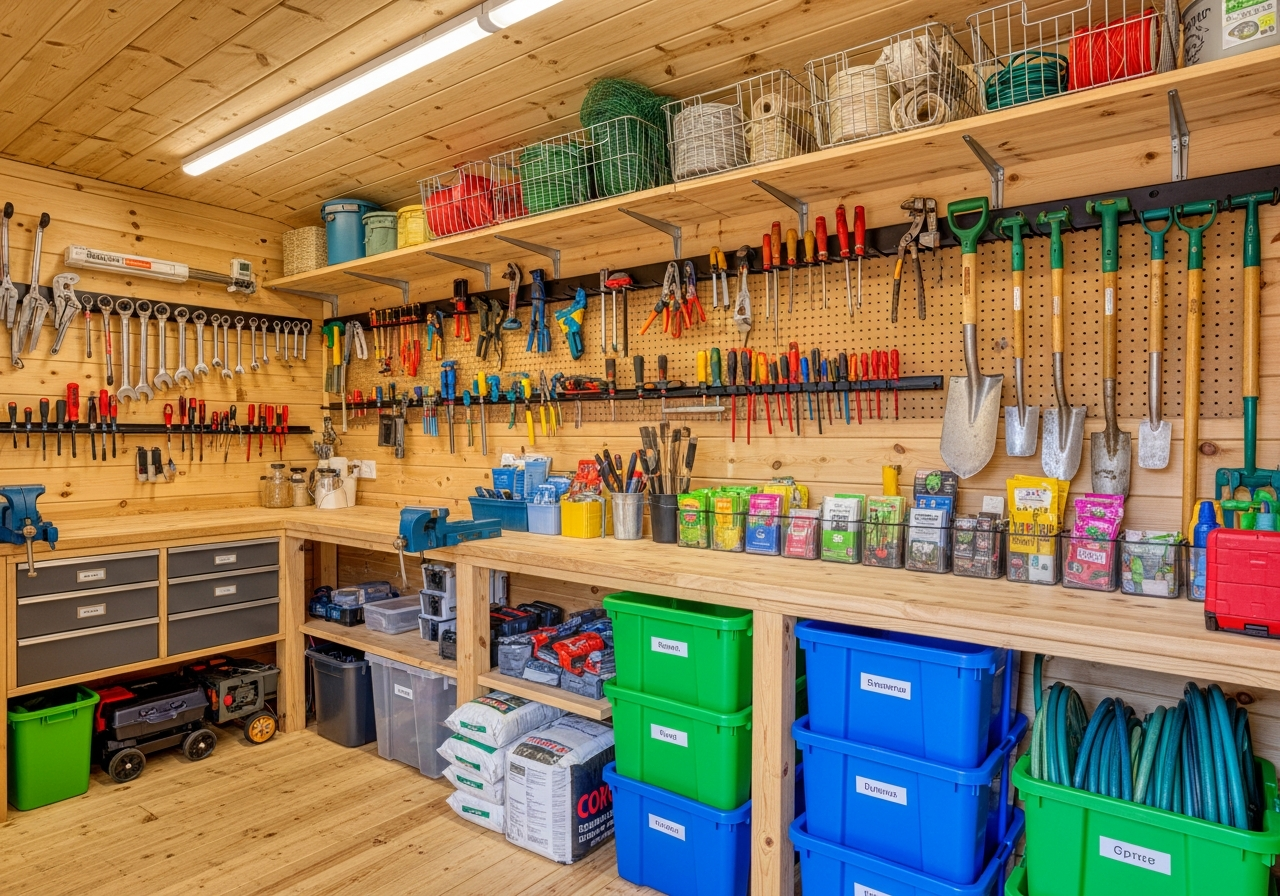
A properly organised shed is a joy to use. Here are the essentials:
Hooks and a perforated hardboard (pegboard) panel for hanging tools. Cheap, endlessly customisable, and keeps everything visible and accessible.
Fix proper shelves to the wall studs. Use 18mm ply for anything heavy. Add a lip on the front edge to stop things falling off. Floor-to-ceiling shelves on one wall maximises space brilliantly.
Ceiling-mounted bike hooks are transformative in a storage shed. Bikes hang vertically out of the way and you suddenly have loads more floor space.
A fixed timber bench at waist height along one wall is incredibly useful — for potting, repairs, or just making cups of tea. Build it from spare timber scraps.
Before you get too smug, have a quick read of the common mistakes — just to check you haven't made any.